文章翻译来源: https://learnwithhasan.com/free-ai-chatbot-on-wordpress/
为微型SaaS网站构建智能AI客服系统的好处?
在构建AI聊天机器人之前,让我们来看看将其添加到您的网站上的五大好处。
1 提供快速、24/7客户服务:AI聊天机器人全天候提供服务,白天和黑夜都不打烊。这意味着您的客户可以随时获取帮助和回答问题,而无需等待营业时间。
2 收集客户反馈:聊天机器人可以轻松向访客征求反馈意见。这帮助您了解客户喜欢什么、不喜欢什么以及他们的需求。这些信息对于改进您的服务或产品非常重要。
3 减少客户请求和支持邮件:有了聊天机器人,许多常见问题可以迅速由机器人自行回答。这减少了需要您关注的信息和邮件的数量,节省您或您团队的时间,以处理更复杂的查询。
4 提升销售和转化率:聊天机器人可以引导访客找到合适的产品或服务,回答他们的问题,甚至在购买过程中帮助他们。这可能导致更多的销售和更好的转化率,因为客户感到得到了支持和对购买感到自信。
5 提高用户体验:聊天机器人可以让您的网站更加互动和有吸引力。它可以提供个性化互动,并确保访客快速高效地找到他们所需的内容。这将带来更好的网站整体体验,使客户持续回访。
参考资料: https://learnwithhasan.com/free-ai-chatbot-on-wordpress/
构建AI客服的步骤:
1,建立代码架构
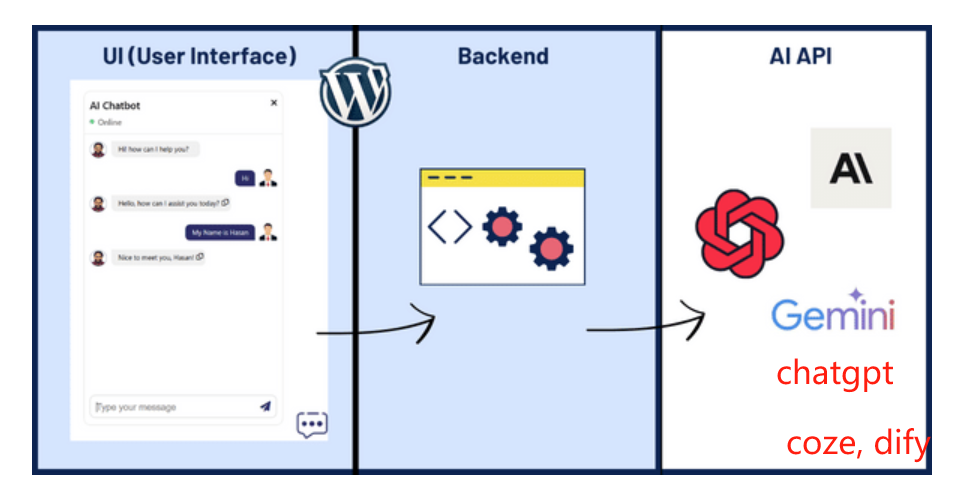
我们的聊天机器人由三个主要部分组成:
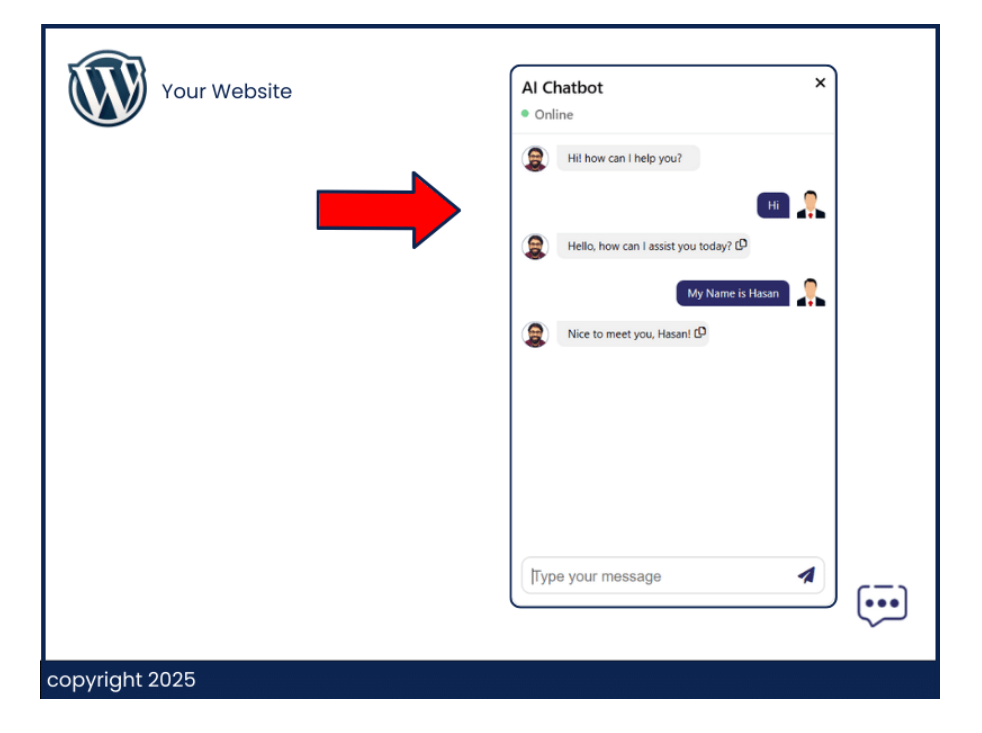
a, UI或聊天机器人界面:这是用户将与之交互的聊天机器人的部分。用户将在这里输入问题,聊天机器人的回应也将在这里显示。它被设计成用户友好和直观的。
b, 后端API:这是聊天机器人的核心部分,所有配置都在这里设置。它处理确定聊天机器人如何响应各种输入所需的逻辑和流程。
c, AI APIs:这些是推动聊天机器人理解和响应用户查询能力的人工智能引擎。您可以使用来自主要供应商如OpenAI、Gemini或Anthropic,或开源模型的API。这些API处理从后端发送的数据,并返回UI显示给用户的回应。
现在我们清楚了AI聊天机器人的结构,让我们开始创建AI聊天机器人UI吧!
2,完成UI的交互设计
这里运用 learnwithhasan 提供的开源UI,达到简单可用的客服UI。
代码地址:https://github.com/hassancs91/AI-CHATBOT-Wordpress
3,完成后端API的服务
我们的后端API服务可以写在模板的function.php,也可以安装插件方便管理:https://wordpress.org/plugins/code-snippets/ Code Snippets插件 (推荐)
后端代码介绍如下:
代码来源: https://github.com/hassancs91/AI-CHATBOT-Wordpress/blob/main/base-chatbot/backend/config.php
function generate_chat_response( $last_prompt, $conversation_history ) {

// OpenAI API URL and key
$api_url = 'https://api.openai.com/v1/chat/completions';
$api_key = 'sk-XXX'; // Replace with your actual API key

// Headers for the OpenAI API
$headers = [
    'Content-Type' => 'application/json',
    'Authorization' => 'Bearer ' . $api_key
];

// Add the last prompt to the conversation history
$conversation_history[] = [
    'role' => 'system',
    'content' => 'Answer questions only related to digital marketing, otherwise, say I dont know'
];

$conversation_history[] = [
    'role' => 'user',
    'content' => $last_prompt
];

// Body for the OpenAI API
$body = [
    'model' => 'gpt-3.5-turbo', // You can change the model if needed
    'messages' => $conversation_history,
    'temperature' => 0.7 // You can adjust this value based on desired creativity
];

// Args for the WordPress HTTP API
$args = [
    'method' => 'POST',
    'headers' => $headers,
    'body' => json_encode($body),
    'timeout' => 120
];

// Send the request
$response = wp_remote_request($api_url, $args);  //wordpress的 request http

// Handle the response
if (is_wp_error($response)) {
    return $response->get_error_message();
} else {
    $response_body = wp_remote_retrieve_body($response);
    $data = json_decode($response_body, true);

    if (json_last_error() !== JSON_ERROR_NONE) {
        return [
            'success' => false,
            'message' => 'Invalid JSON in API response',
            'result' => ''
        ];
    } elseif (!isset($data['choices'])) {
        return [
            'success' => false,
            'message' => 'API request failed. Response: ' . $response_body,
            'result' => ''
        ];
    } else {
        $content = $data['choices'][0]['message']['content'];
        return [
            'success' => true,
            'message' => 'Response Generated',
            'result' => $content
        ];
    }
}
}

function generate_dummy_response( $last_prompt, $conversation_history ) {
  // Dummy static response
  $dummy_response = array(
    'success' => true,
    'message' => 'done',
    'result' => "here is my reply"
);

  // Return the dummy response as an associative array
  return $dummy_response;
}

function handle_chat_bot_request( WP_REST_Request $request ) {
  $last_prompt = $request->get_param('last_prompt');
  $conversation_history = $request->get_param('conversation_history');

  $response = generate_chat_response($last_prompt, $conversation_history);
  return $response;
}

function load_chat_bot_base_configuration(WP_REST_Request $request) {
  // You can retrieve user data or other dynamic information here
  $user_avatar_url = "https://learnwithhasan.com/wp-content/uploads/2023/09/pngtree-businessman-user-avatar-wearing-suit-with-red-tie-png-image_5809521.png"; // Implement this function
  $bot_image_url = "https://learnwithhasan.com/wp-content/uploads/2023/12/site-logo-mobile.png"; // Implement this function

$response = array(
'botStatus' => 0,
'StartUpMessage' => "Hi, How are you?",
'fontSize' => '16',
'userAvatarURL' => $user_avatar_url,
'botImageURL' => $bot_image_url,
// Adding the new field
'commonButtons' => array(
    array(
        'buttonText' => 'I want your help!!!',
        'buttonPrompt' => 'I have a question about your courses'
    ),
    array(
        'buttonText' => 'I want a Discount',
        'buttonPrompt' => 'I want a discount'
    )

)

);

  $response = new WP_REST_Response($response, 200);

  return $response;
}
// 下面就是wordpress提供 api的写法,上面的函数就是实现调用
add_action( 'rest_api_init', function () {
register_rest_route( 'myapi/v1', '/chat-bot/', array(
   'methods' => 'POST',
   'callback' => 'handle_chat_bot_request',
   'permission_callback' => '__return_true'
) );

register_rest_route('myapi/v1', '/chat-bot-config', array(
    'methods' => 'GET',
    'callback' => 'load_chat_bot_base_configuration',
));
} );
上面的wordpress后端接口api代码就是最简单的调用大模型/chatgpt的基础代码,我们的客服功能可以基于这个基础来实现自己想达到的功能,例如语料库,agent调用,调用wordpress自身功能等等。
4,整合SaaS,提供服务的语料库 / 向量数据库资料
wordpress后端实现写入向量数据库pinecone,可以把SaaS资料写入数据库就可以调用,这里的hook可以是文章发表后自动调用写入:
// 设置Pinecone服务的URL和API密钥
$pinecone_api_url = 'https://api.pinecone.io/v1/writer/INDEX_NAME/ITEM_NAME'; // 注意替换为您的INDEX_NAME和ITEM_NAME
$pinecone_api_key = 'YOUR_API_KEY'; // 注意替换为您的API密钥

// 准备要写入的数据
$data = [
    'name' => 'John Doe',
    'age' => 30,
    'email' => 'johndoe@example.com'
];

// 使用cURL进行写入操作
$ch = curl_init();
curl_setopt($ch, CURLOPT_URL, $pinecone_api_url);
curl_setopt($ch, CURLOPT_CUSTOMREQUEST, "PUT");
curl_setopt($ch, CURLOPT_RETURNTRANSFER, true);
curl_setopt($ch, CURLOPT_HTTPHEADER, ['Content-Type: application/json', 'Authorization: Bearer ' . $pinecone_api_key]);
curl_setopt($ch, CURLOPT_POSTFIELDS, json_encode($data));

$result = curl_exec($ch);
curl_close($ch);

echo "Data written successfully. Response: " . $result . "\n";
当用户咨询问题时候,我们的客服AI可以调用向量数据库,得到资料背景,更准确的回答问题:
// 准备要查询的数据
$query = [
    'name' => '用户问的问题'
];

// 使用cURL进行调用操作
$ch = curl_init();
curl_setopt($ch, CURLOPT_URL, $pinecone_api_url);
curl_setopt($ch, CURLOPT_CUSTOMREQUEST, "POST");
curl_setopt($ch, CURLOPT_RETURNTRANSFER, true);
curl_setopt($ch, CURLOPT_HTTPHEADER, ['Content-Type: application/json', 'Authorization: Bearer ' . $pinecone_api_key]);
curl_setopt($ch, CURLOPT_POSTFIELDS, json_encode($query));

$response = curl_exec($ch);
curl_close($ch);

echo "Data retrieved successfully. Response: " . $response . "\n";

?>
5,或者利用第三方API。
基于这些平台:dify,coze,百度AI等,做好资料库和相关引用,生成api,调换上去客服接口,就可以实现相同效果。
6,agent智能体的调用
$systemPrompt = <<<EOD
You run in a loop of Thought, Action, PAUSE, Action_Response.
At the end of the loop you output an Answer.
Use Thought to understand the question you have been asked.
Use Action to run one of the actions available to you - then return PAUSE.
Action_Response will be the result of running those actions.
Your available actions are:
get_response_time:
e.g. get_response_time: learnwithhasan.com
Returns the response time of a website
Example session:
Question: what is the response time for learnwithhasan.com?
Thought: I should check the response time for the web page first.
Action:
{
  "function_name": "get_response_time",
  "function_parms": {
    "url": "learnwithhasan.com"
  }
}
PAUSE
You will be called again with this:
Action_Response: 0.5
You then output:
Answer: The response time for learnwithhasan.com is 0.5 seconds.
EOD;
参考agent: https://learnwithhasan.com/custom-code/ai-agent-on-wordpress-with-a-php-snippet/
客服实战:
下面我介绍怎样简单实现真正的智能客服,自动回答站点的资料QA问题:
todo
第三方方案?
如果不想自己开发,那么就可以试试 https://oneai.com/business-center ,
一键爬取全网站内容,然后转为 客服挂在自己网站上就可以。
